
For studios · Settings
Outbound webhooks
Send your studio's events (new bookings, customers, payments and more) to your own tools in real time.
Outbound webhooks let Atelier Studio tell your other tools the moment something happens: a new booking, a new customer, a payment, and more. Instead of you copying information across by hand, your studio sends each event straight to a web address you control, the instant it occurs.
That web address is called an endpoint, a URL you own that can receive the data. It might belong to your own customer database (CRM), an automation tool like Zapier, Make, or n8n, or a system your team built. Whenever a subscribed event happens, Atelier Studio sends that endpoint a small, secure message describing what changed.
Which plans include webhooks
Webhooks are part of the Network plan, Atelier Studio’s top tier. They’re not included on the Community or Academy plans, or during a free trial.
On Network you get unlimited endpoints, the full catalog of events, a 30-day delivery history, and the ability to roll your signing secret (more on that below).
Where to find it
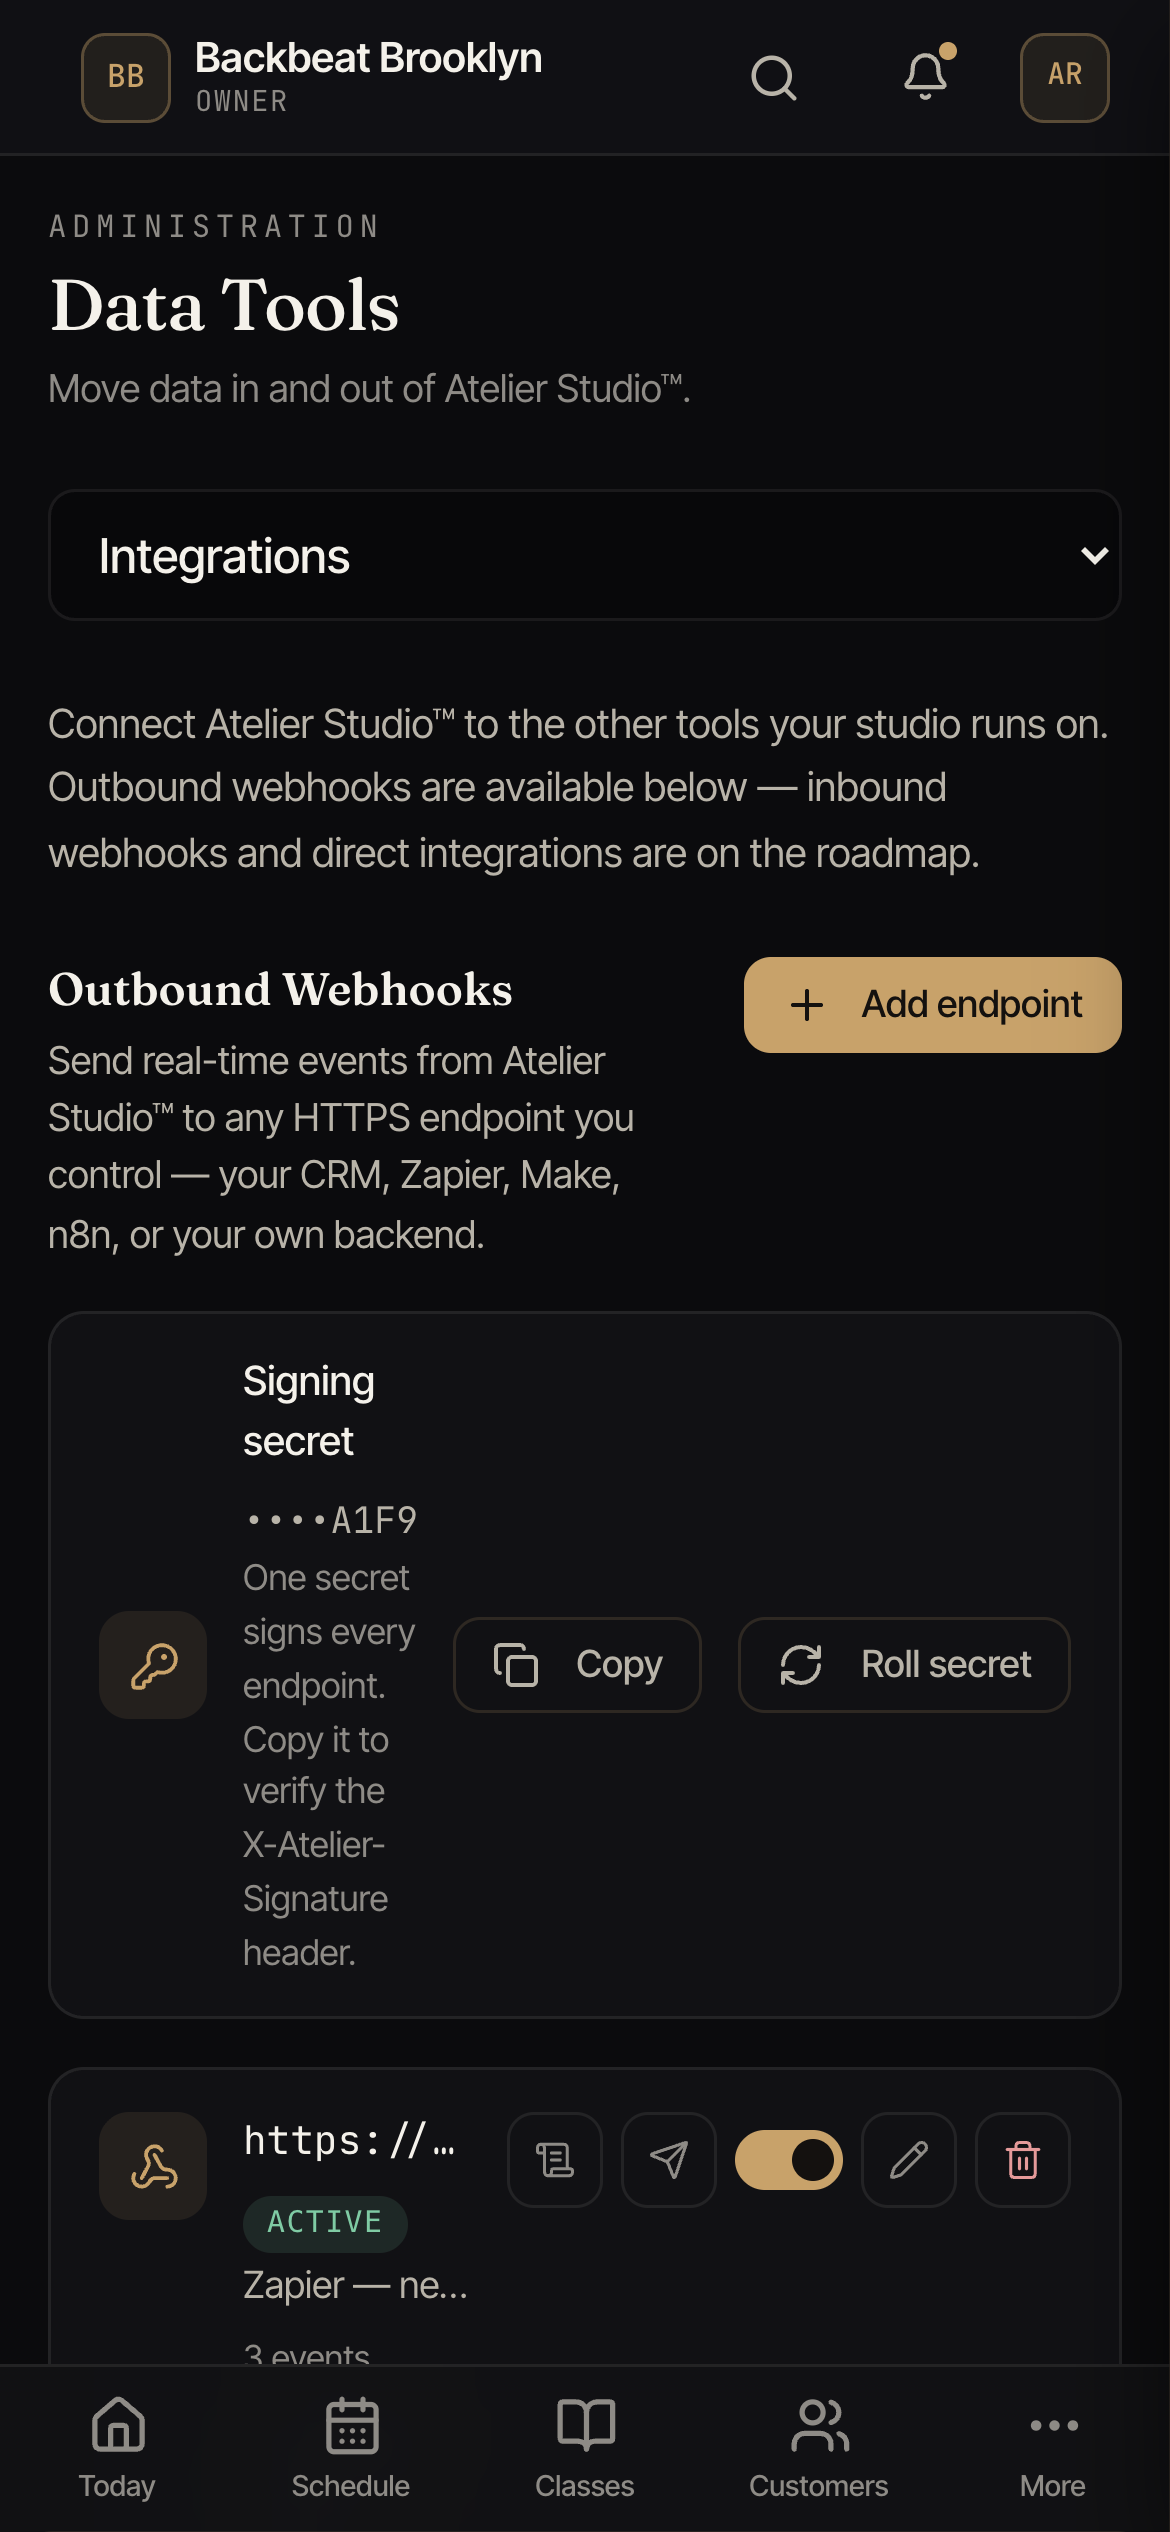
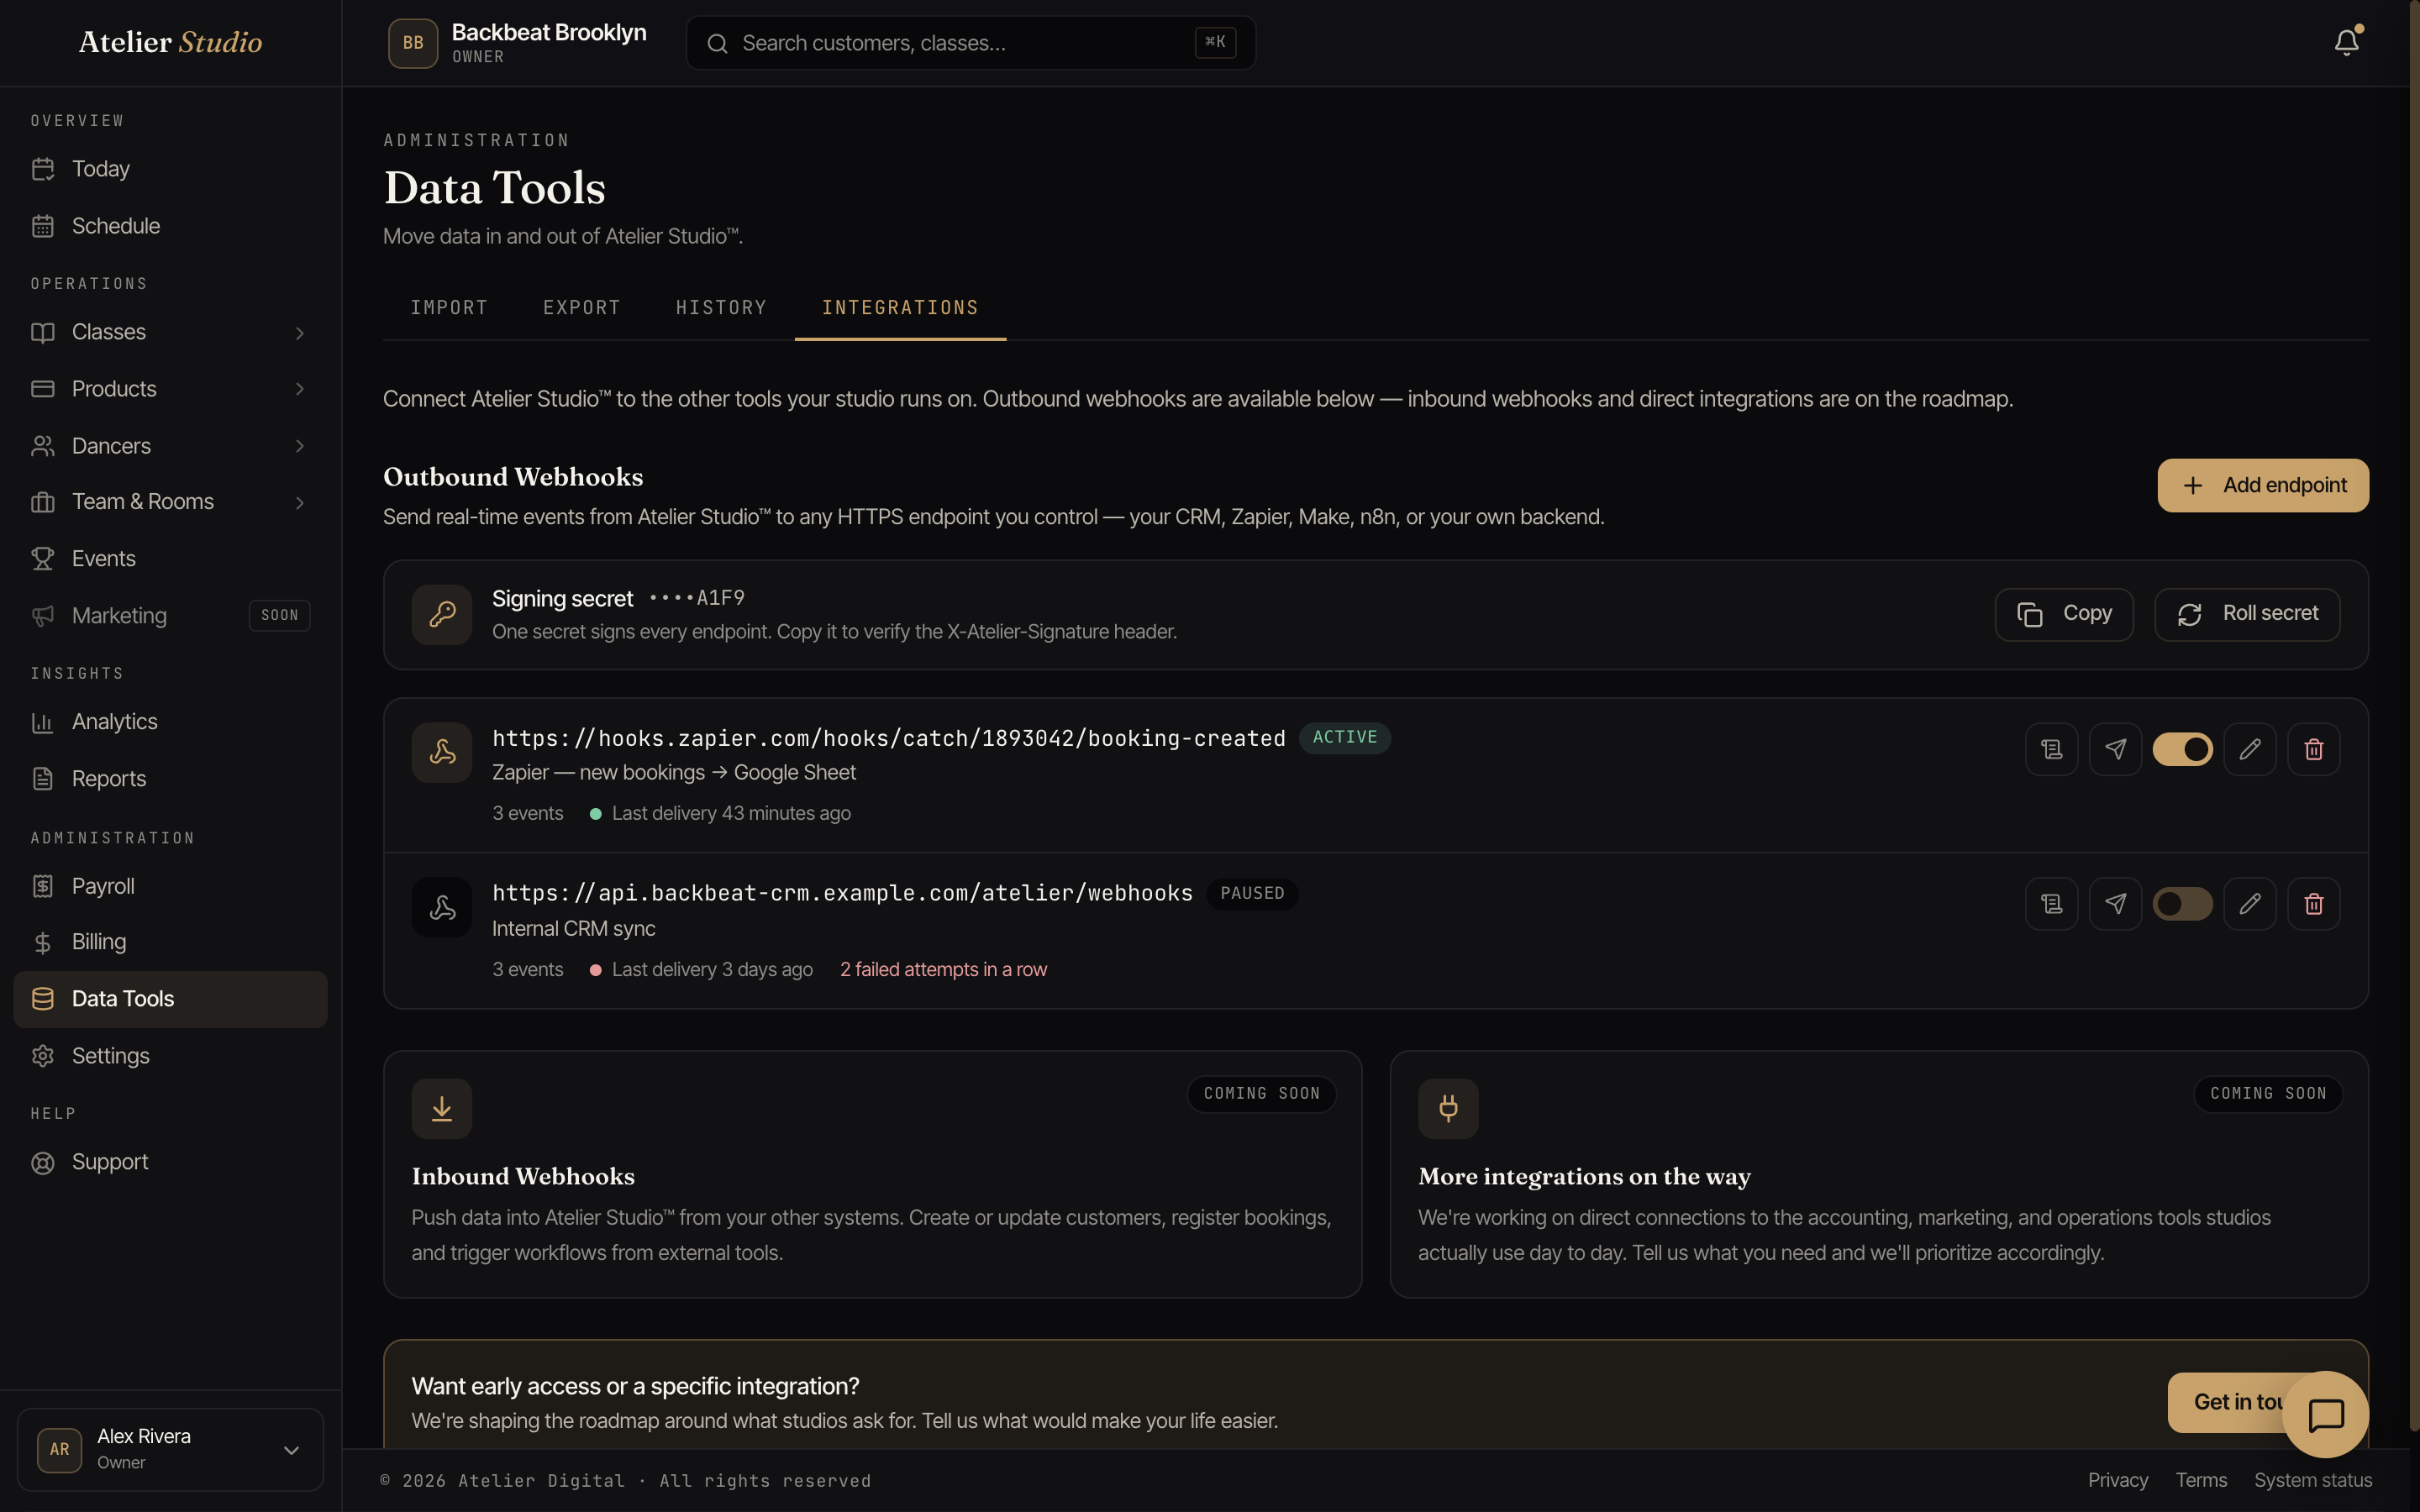
Open Data Tools, then choose the Integrations tab (it appears on the Network plan). Everything for webhooks lives there: your signing secret, your list of endpoints, and the delivery history for each one.
Your signing secret
So your other systems can trust that a message really came from your studio, every webhook is signed. Your studio has one signing secret that signs every endpoint, shown at the top of the Integrations tab.
Each message arrives with an X-Atelier-Signature header, a value in the form
t=<timestamp>,v1=<signature>. Whoever set up your receiving endpoint uses the
signing secret to check that header and confirm the message is genuine and
hasn’t been tampered with.
For security, the full secret is shown only once: when it’s first created, and again right after you roll it. After that you can Copy it to your clipboard at any time, but it’s never displayed on screen again.
Adding an endpoint and choosing events
Select Add endpoint to open the setup window:
- Endpoint URL: the secure web address that will receive the data. It must
start with
https://. - Description: an optional label so you remember what an endpoint is for (for example, “Zapier: new bookings”).
- Events to send: pick which events trigger a message to this endpoint.
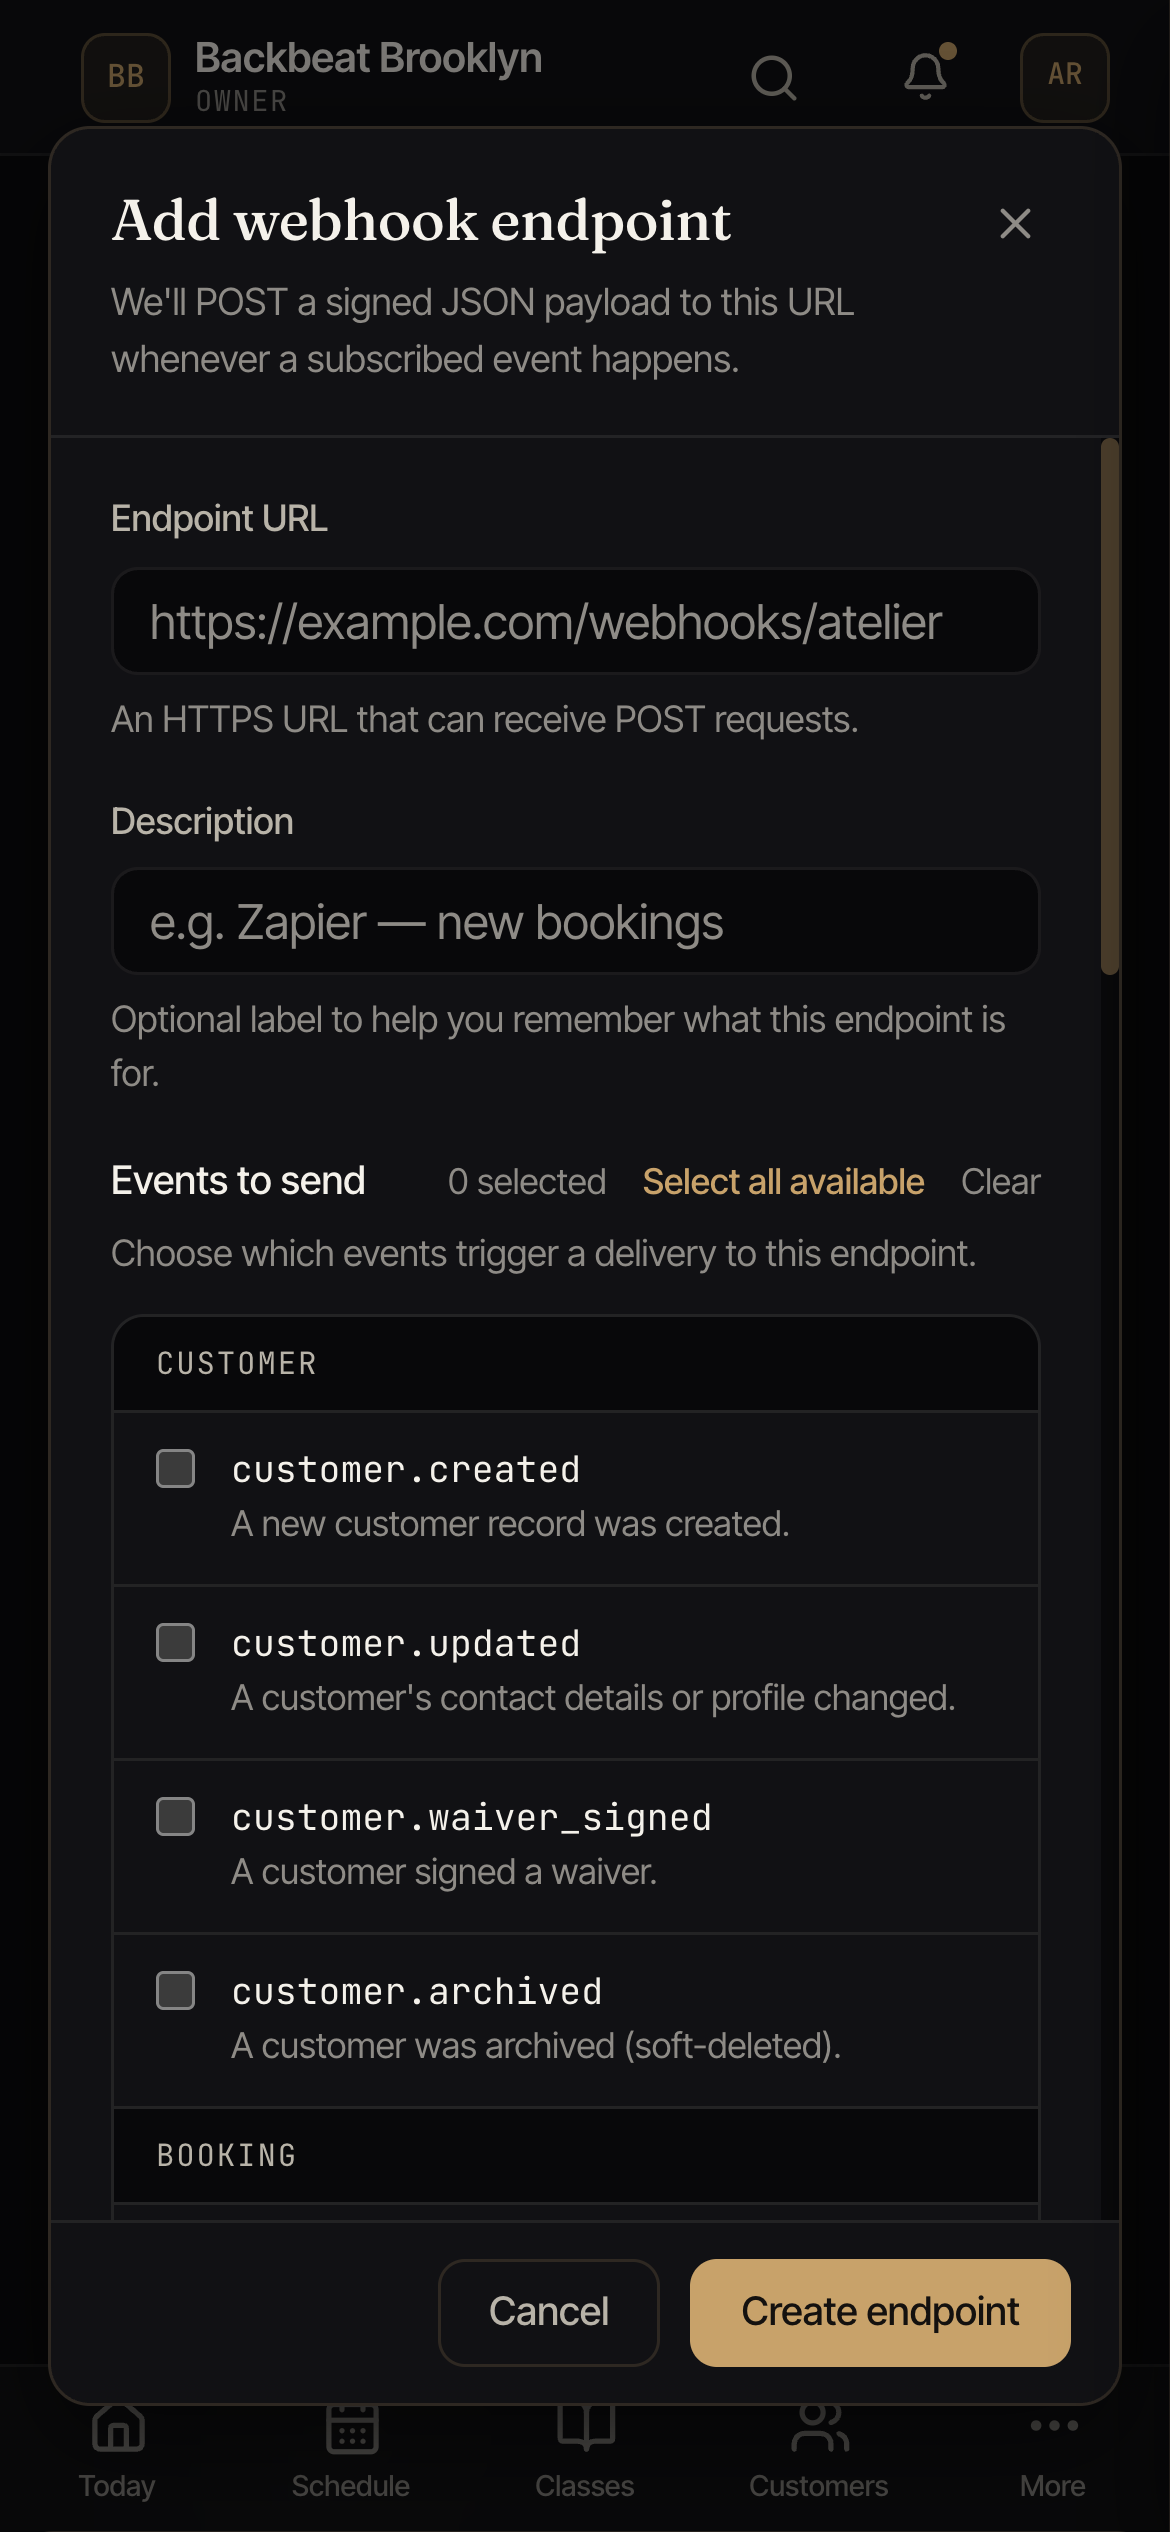
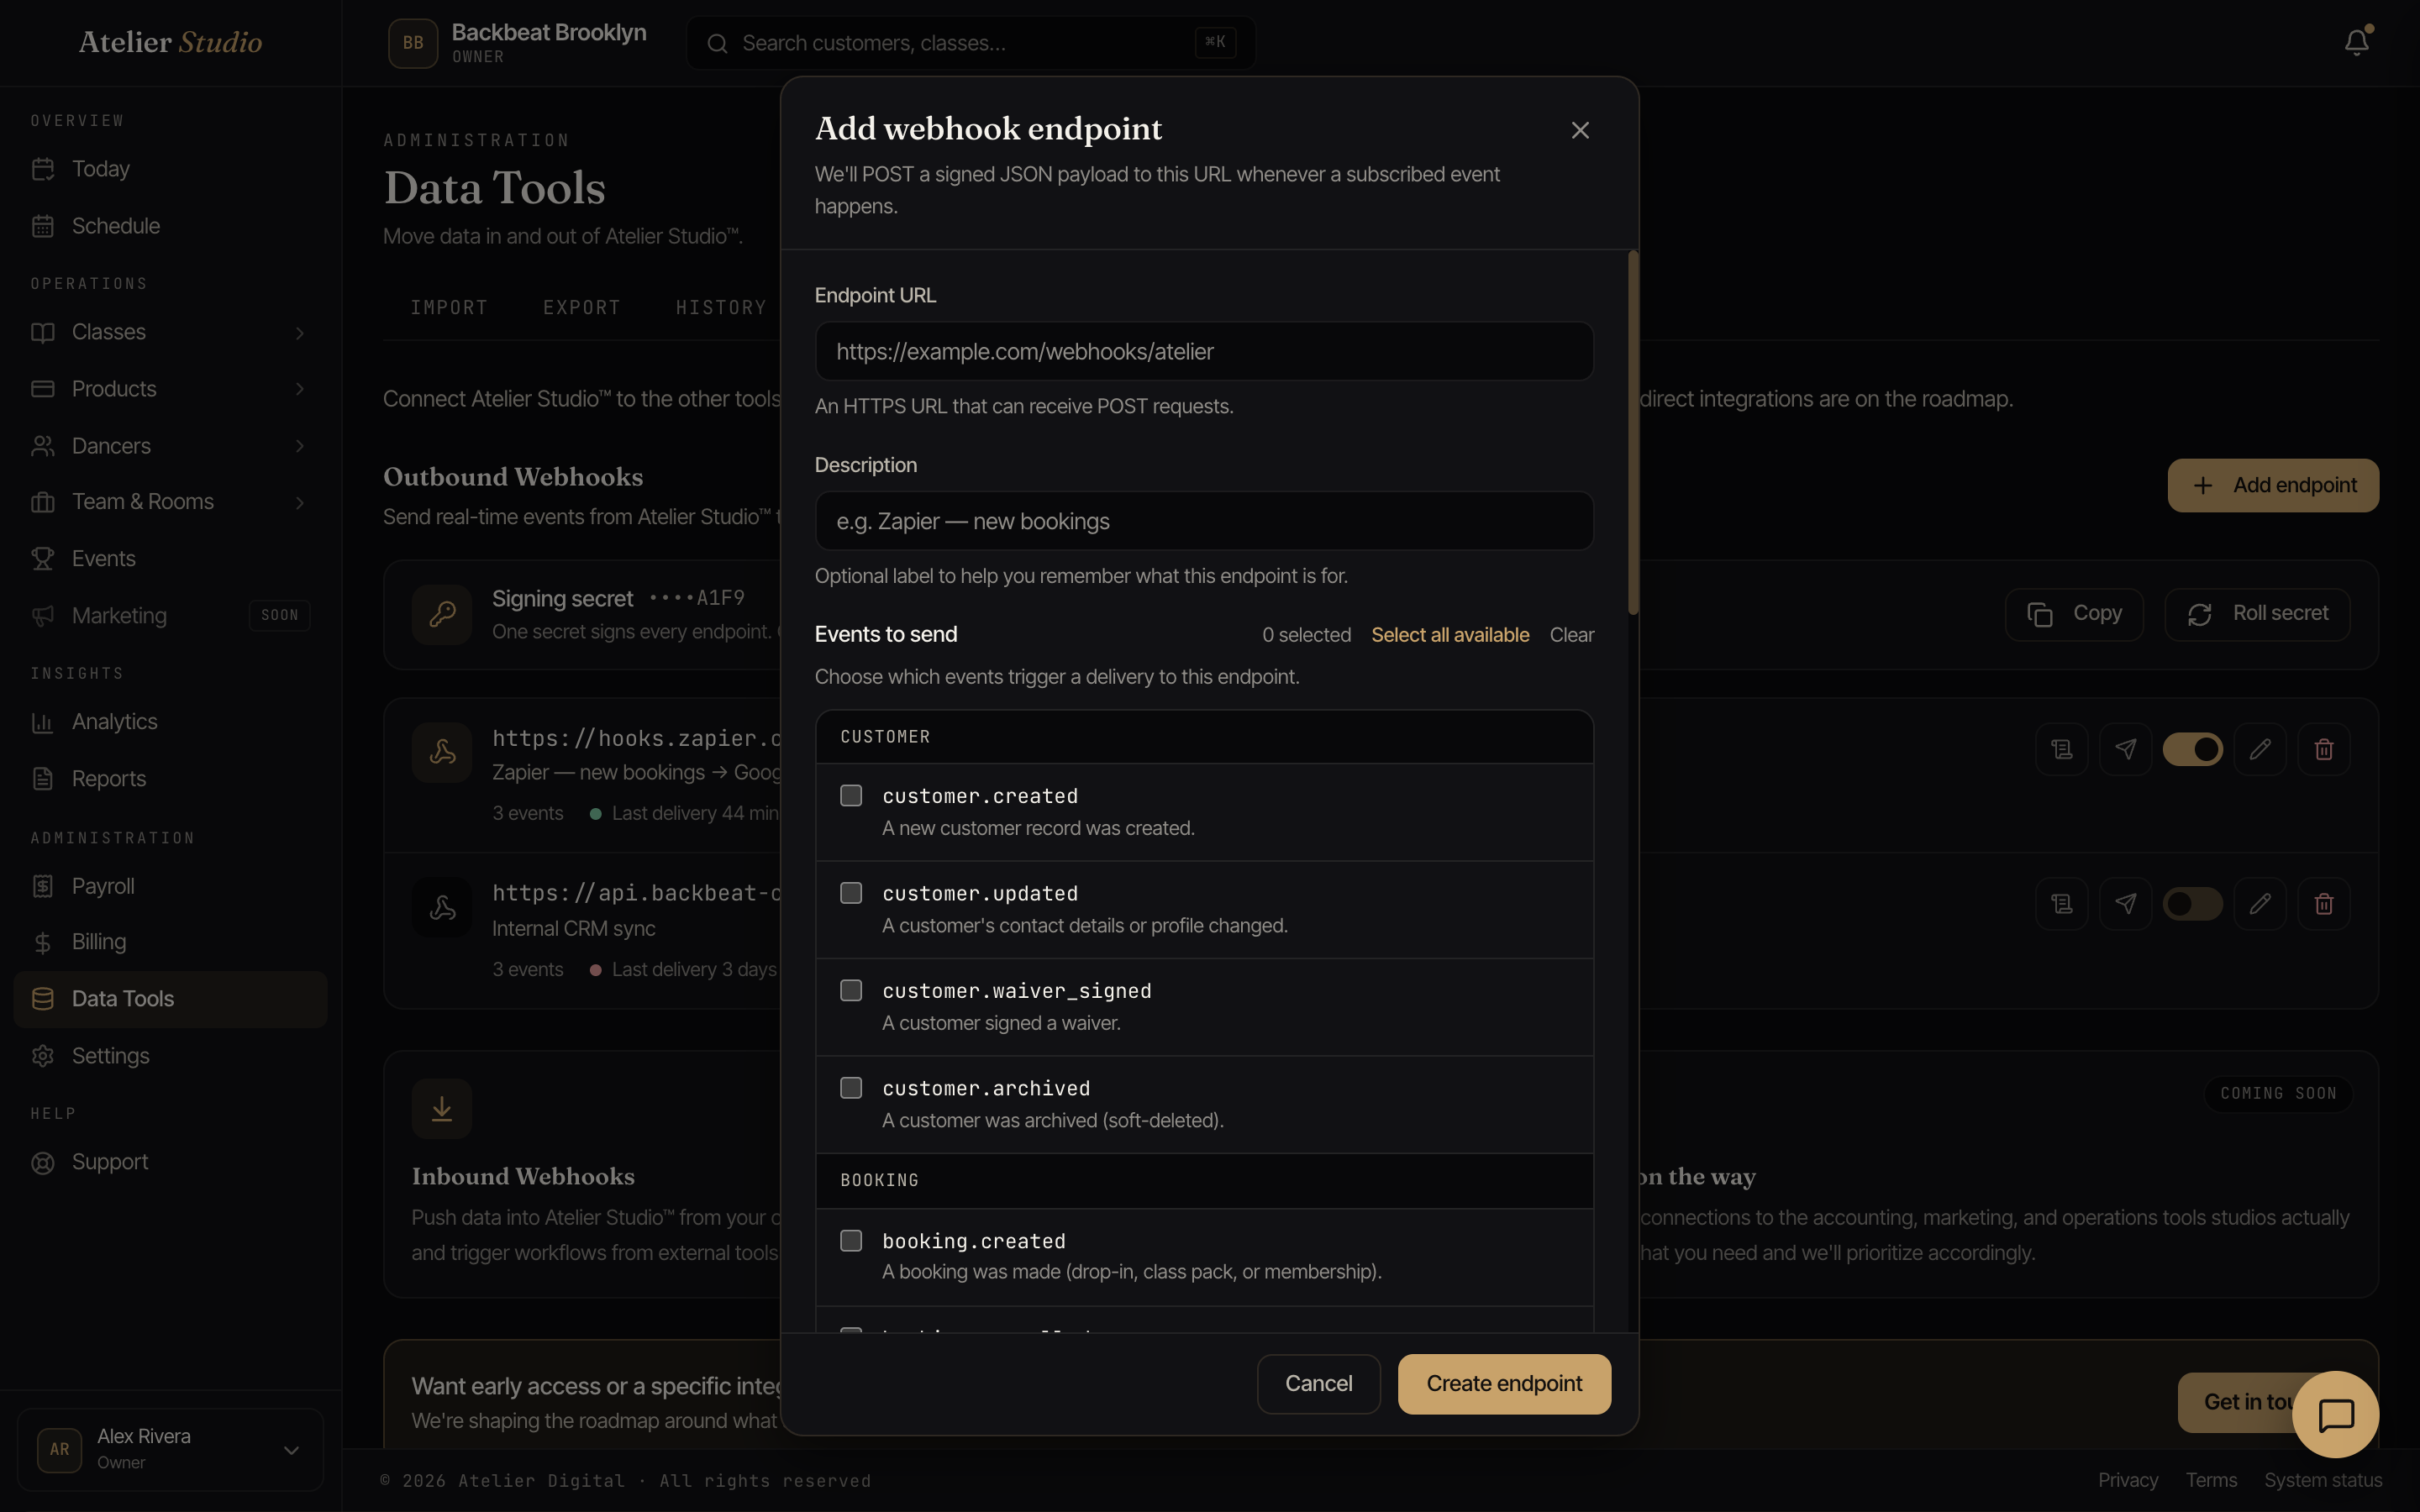
The events are grouped by area: new bookings and cancellations, new and updated customers, payments, memberships, class packs, classes, and more. On the Network plan you can subscribe to the whole catalog.
A booking event now also fires when a group booking’s spot count is reduced (for example, part of a party cancels), not just on a new booking or a full cancellation. And a refund on a booking (a cancellation or a partial refund from reducing a group’s spots) now sends the same payment-refunded event you already get for other refunds, so you don’t need a separate integration to catch booking refunds.
You can subscribe one endpoint to a single event or to many, and point different endpoints at different tools. Use Select all available or Clear to set the whole list quickly.
Testing and the delivery log
After you save an endpoint, confirm everything is wired up correctly before you rely on it.
- Send test delivers a sample event to the endpoint right away, so you can check your receiver accepts it.
- Delivery log opens a history of recent attempts for that endpoint, each one showing the event, whether it succeeded, the response code that came back, when it happened, and how many attempts it took. Expand any row to see the exact message that was sent and the response your endpoint returned.
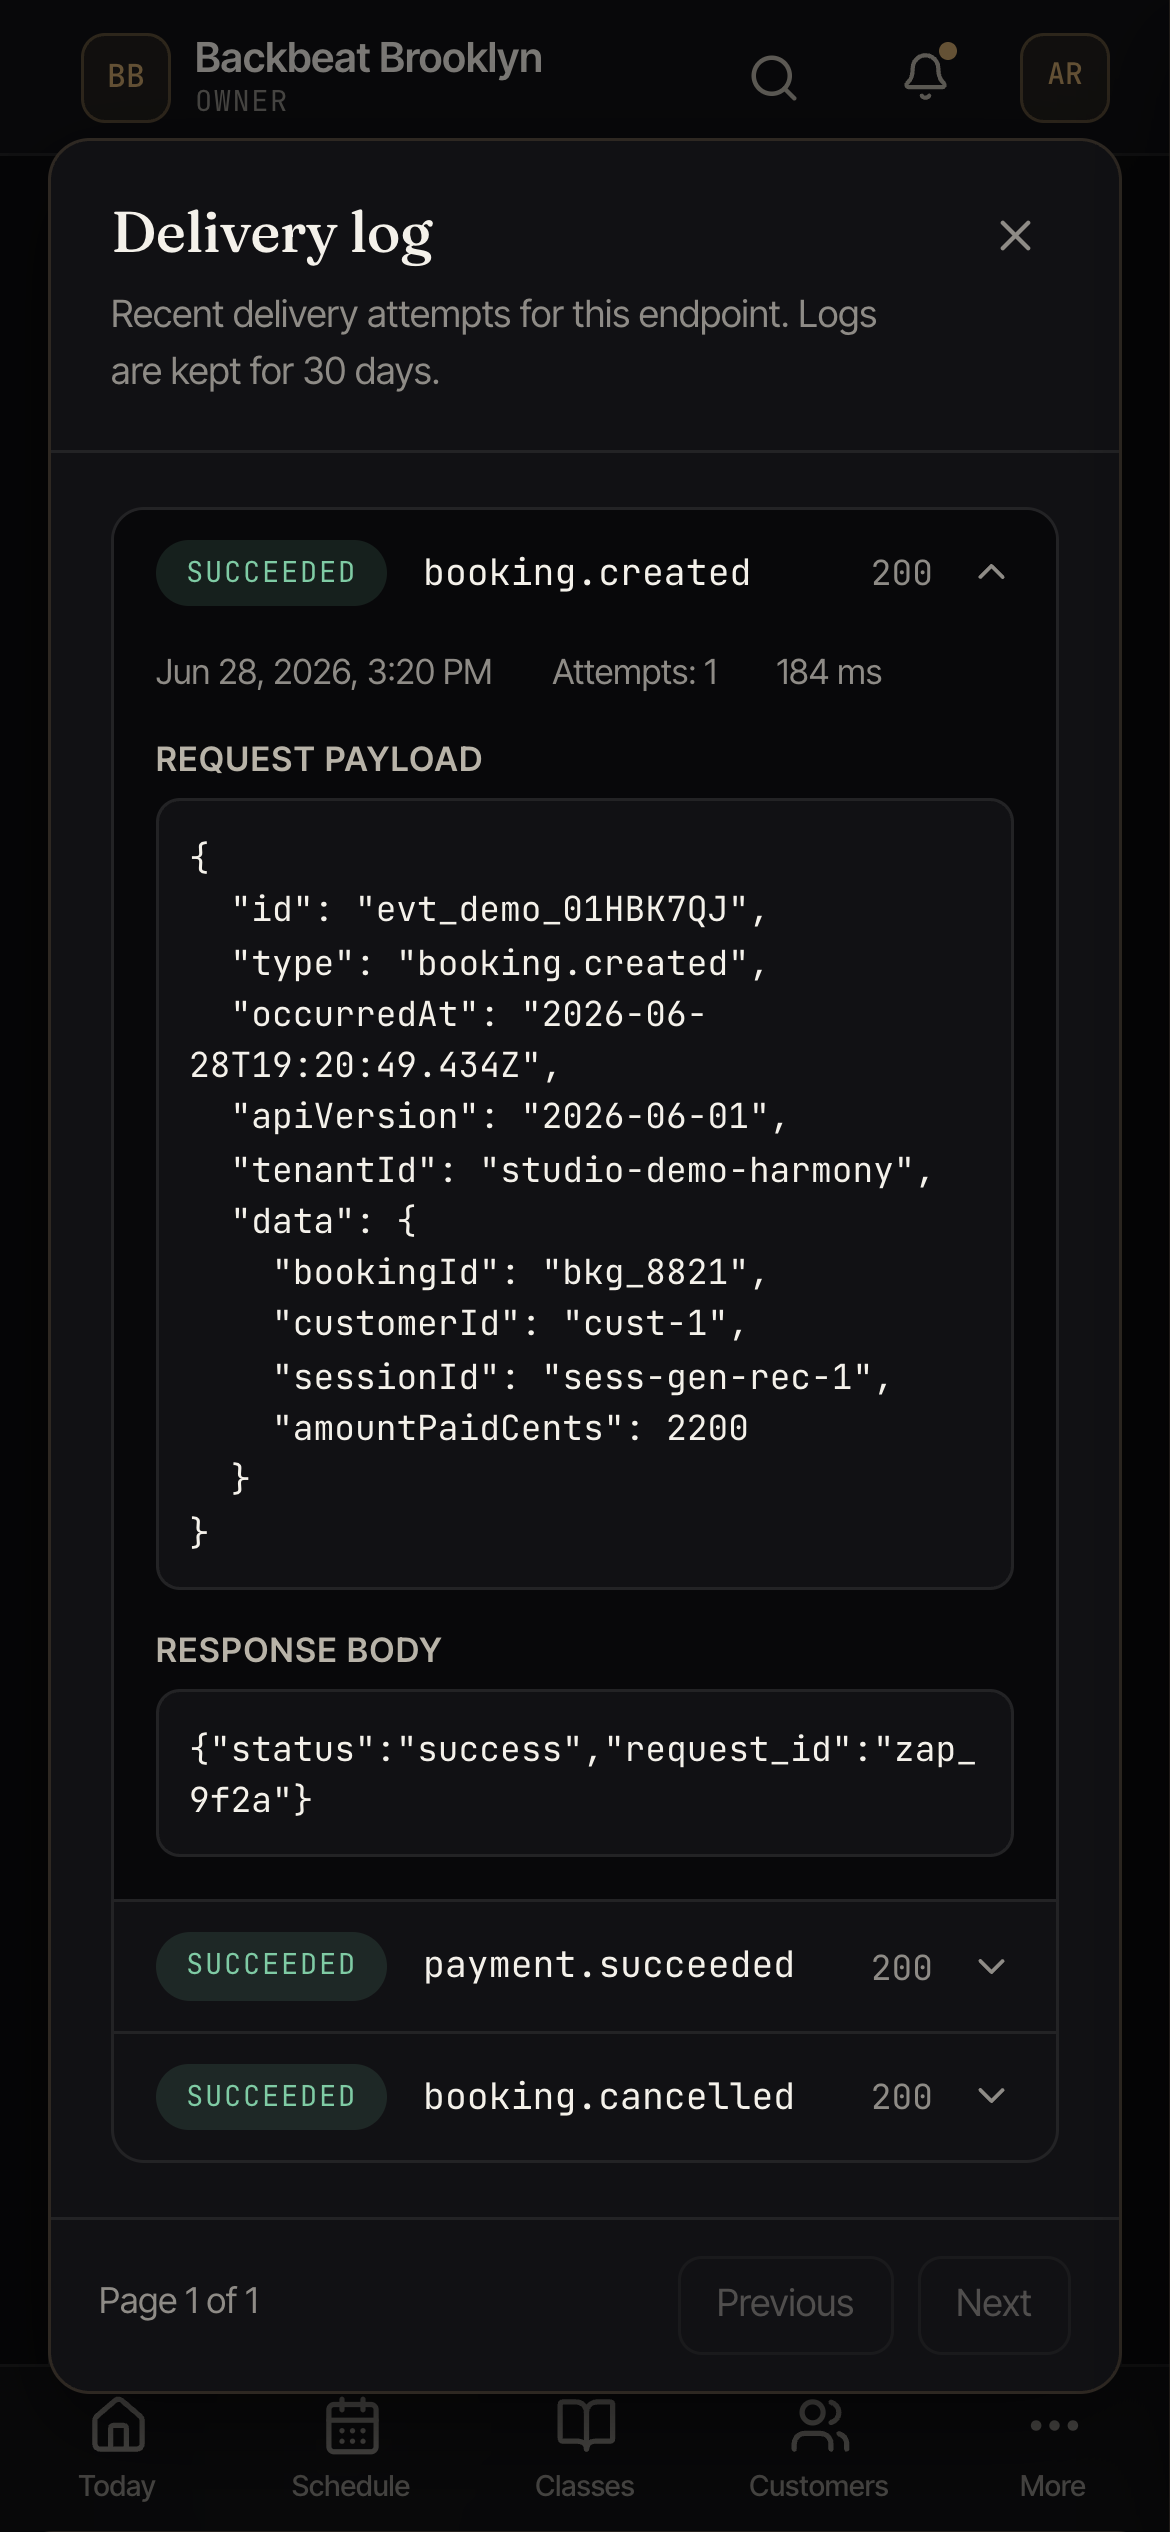
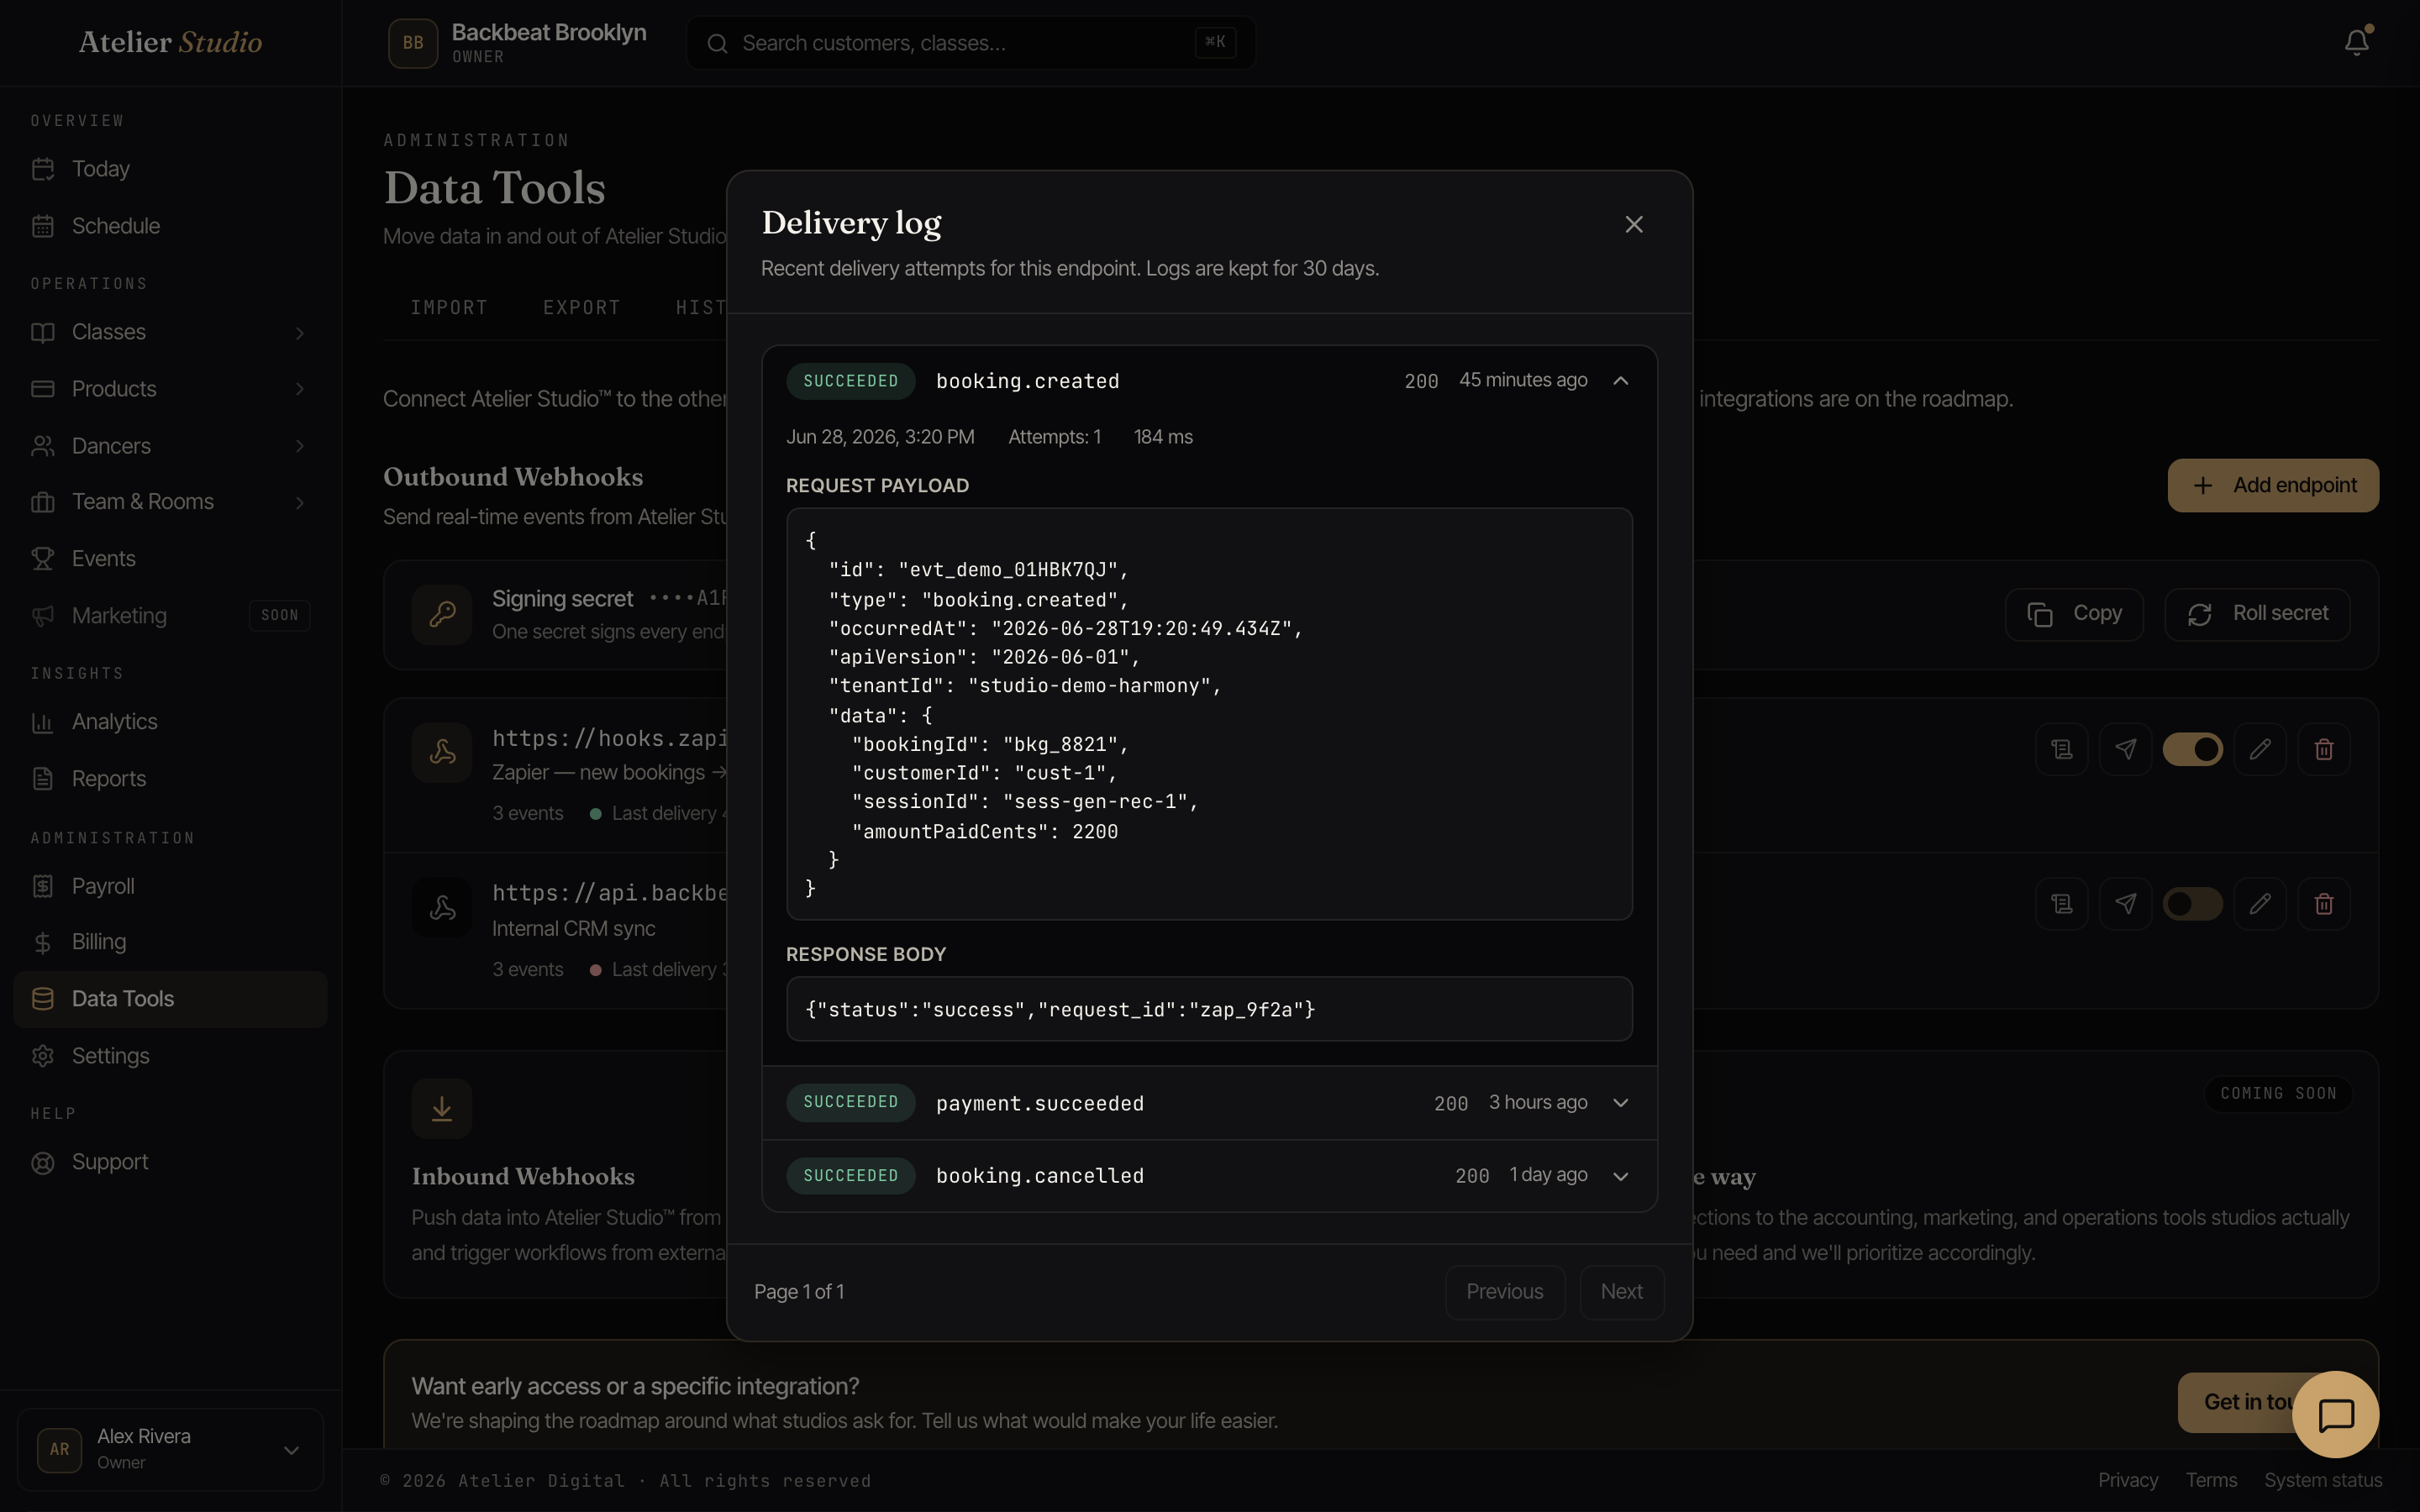
The delivery log is kept for 30 days.
If a delivery doesn’t get through, Atelier Studio automatically tries again a few times, waiting a little longer between each attempt. If an endpoint keeps failing, its row shows a warning telling you how many attempts in a row have failed. That’s usually a sign the receiving address has changed or gone offline.
Pausing, editing, and deleting
Each endpoint has its own controls:
- Pause stops deliveries to that endpoint without removing it, which is handy while you make changes on your side. Its pill switches from Active to Paused, and you can Resume any time.
- Edit lets you change the URL, description, or which events it receives.
- Delete removes the endpoint for good. Events stop reaching that address immediately, and this can’t be undone.
More integrations coming
Outbound webhooks are the first of several ways to connect Atelier Studio to your other tools. Inbound webhooks and additional ready-made integrations are on the way, and you’ll see them appear in the Integrations tab as they arrive.